
How To Share Templates of Course Materials Using Google Docs or Google Sheets
Want to deliver an ideal learning experience to those who sign up for your course, coaching program, or workshop?
Then make sure to provide course materials and create sharable digital docs to help them implement the concepts you teach.
Pre-made templates are a popular way to save your students time and effort. Students can fill in their data in an organized manner and get results faster.
Create and share digital and editable templates using Google Docs or Google Sheets
If you already have a Google account, then Google Docs and Sheets is an ideal tool for creating your templates. If you don’t have an account yet, it’s free to create one!
Your Docs and Sheets are stored as files in Google Drive. Google Drive is an online storage solution that allows you to access files from anywhere on any device. Drive makes it super easy for you to share your files.

Example of a Google Docs template I created to help users write social media captions for the month
How to create a sharable template doc that others can copy and customize
It’s important that you share a COPY of your template instead of the template itself. There are two main reasons for this:
Users can save the template wherever they want on their own Google Drive
When users update the template, their changes will NOT affect your original template.
The sharing process includes 6 steps:
Go to Google Drive and open the template you want to share.
Click the Share button.
Update the link sharing settings
Copy the link for the template
Update the link so it ends with /copy
Share the updated link to your students
Step 1: Go to Google Drive and open the template you want to share
To help explain this step, I will use my Course Launch Roadmap Template as an example. This is a Google Sheets template to plan important tasks for a course launch.
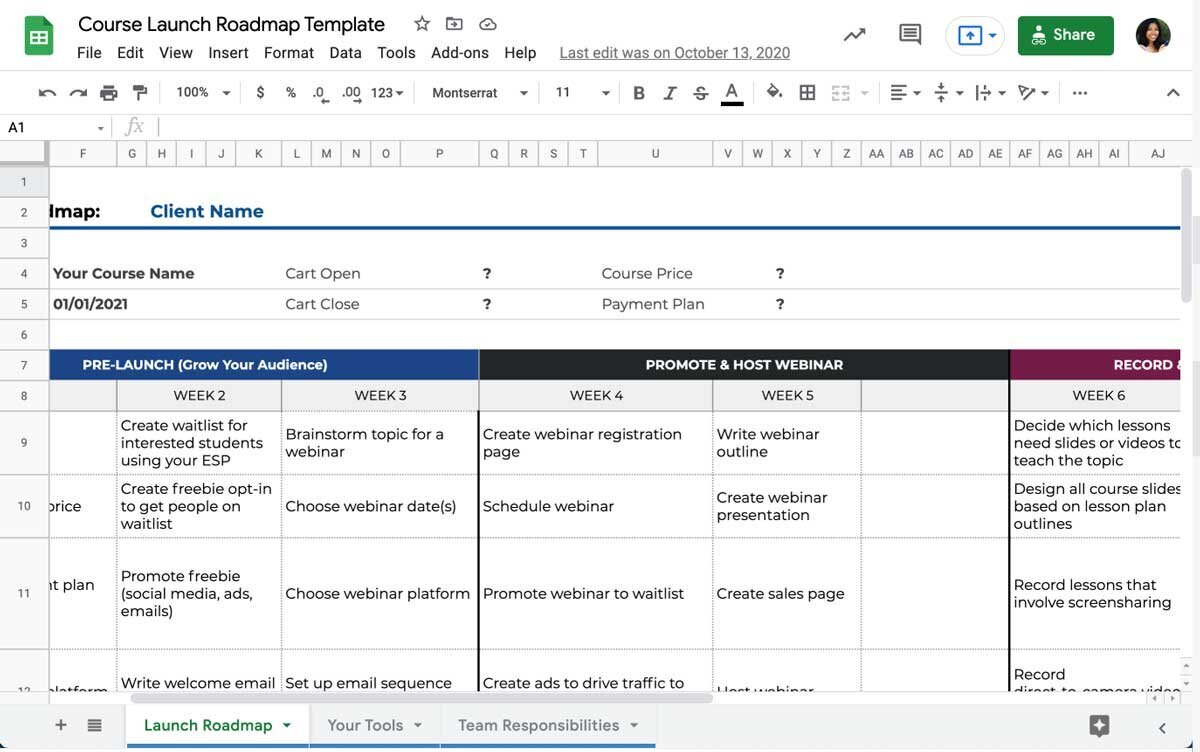
Example of a template I created to help course creators plan their course launch
NOTE: You can edit this template as many times as you need. As long as you’re the only editor, only you have the ability to make changes. Those who access your template will be making a COPY of the template for their own use. That means any changes they make to their copy will NOT affect your original template.
Step 2: Click the Share button
When viewing on your laptop, click the Share button in the top right of your screen.
When sharing a Google Doc, this button is colored blue. When sharing a Google Sheet, this button is colored green.
Step 3: Update the link sharing settings
After you click the Share button, a pop-up window will appear. This window shows you the shareable link for the template.
But wait!
Before you copy this link, you’ll need to update the share settings in the “Get Link” section.
There’s a dropdown that shows the current link sharing settings for the file.
We do NOT want the option that says “Restricted - only people added can open with this link.” That means you have to manually grant people access by entering their email address in the “Share with people and groups” section above.
Instead, change the option to Anyone with the link. This means anyone on the internet who receives this link can view the file.

Step 4: Copy the link for the template
Now that you’ve updated the sharing settings, you can click the Copy link button.

Next, paste the link into a text editor (like Microsoft Word, another Google Doc, or a Notes app) so you can see the full URL.
Your link will look something like this:

Step 5: Update the link so it ends with /copy
Here’s where the magic happens!
Notice how the URL ends with “edit” and additional text after it? We need to replace that portion so that the URL ends with /copy instead.
In your text editor, delete the “edit” portion and type the word “copy.” So the URL will then look like this:

This is the updated link you will share!
Step 6: Share the updated link to your students
When students click your link, they will see a web page asking if they want to make a copy of your template.
When they click the Make a copy button, the template will open in their Google account. (Google will first ask them to sign into their account if they're not logged in already.)

You’ll know the copy feature worked because the file name in the top left will say “Copy of [Template Name].” The student can make any change to this file WITHOUT affecting your original template.

Final Thoughts on Creating Sharable Digital Docs
Now that you know how easy it is to share a template, it’s time to create your own!
Here are popular ideas for templates:
Content calendar template to plan and track content across many channels
Inventory tracking template to keep items organized and easy to find
Financial projections template to estimate how much you'll earn based on certain factors
Benchmark templates to track statistics for ads, sales, and other industry specific metrics
Checklists for key tasks in a certain process
Copywriting templates to help write emails, blog posts or captions
If you’re also interested in creating a shareable template in Canva, check out this blog post. It’s a full beginner’s guide on how to create your own Canva template as a digital product for your business.
Comment below if you found this helpful, and please share if you made your own template as a result!
Helping you conquer the digital empire,
Klara
Online Course Resources:
3 Signs It's Time To Offer Digital Products To Make More Money In Less Time
How To Grow Your Email List For FREE Before You Launch An Online Course
How To Choose the Right Problem to Solve with Your Online Course
Check out our helpful Canva templates and learn how to sell them on Etsy:
Speaker One Sheet Canva Template | Canva Branding Template | Canva Checklist